
 under-the-t-top
How to Prevent Marine Light Corrosion
Table of Contents
- What Causes Marine Light Corrosion
- How to Waterproof LED Light Connections
- Material Selection: Stainless Steel and Tinned Copper
- Best Marine Corrosion Inhibitor Spray for Electrical Systems
- Marine Grade Electrical Connection Protection Methods
- Step-by-Step Maintenance Schedule for Marine Lights
- LED vs. Incandescent: Corrosion Susceptibility Differences
- Frequently Asked Questions
Last Updated: September 28, 2026
What Causes Marine Light Corrosion
Marine light corrosion occurs when saltwater, moisture, and electrical current combine to attack metal connectors and wiring, accelerating oxidation on copper, brass, and aluminum and creating electrolysis that speeds breakdown, but you can prevent marine light corrosion with proper waterproofing and maintenance.
How to Waterproof LED Light Connections
Waterproofing LED light connections is the first line of defense to prevent marine light corrosion by blocking saltwater and moisture from reaching metal parts where corrosion starts.
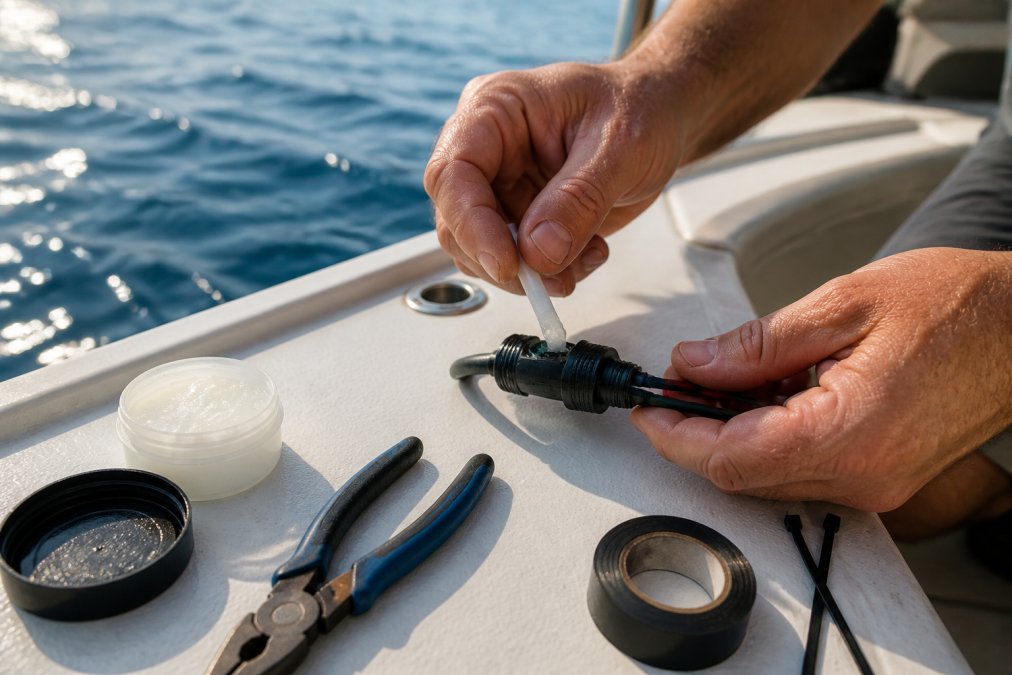
Using Dielectric Grease and Contact Cleaners
Dielectric grease creates a non-conductive moisture barrier on connector contacts without interfering with electrical flow. Apply a thin layer to every connection point before sealing:
- Disconnect the light from power
- Gently pull the connector apart
- Clean both sides with contact cleaner to remove any existing corrosion
- Let the cleaner dry completely (2-3 minutes)
- Apply a small amount of dielectric grease to each contact pin
- Reconnect the parts firmly until they click
Heat Shrink Connectors and Sealing Compounds
Heat shrink connectors provide mechanical and environmental protection, sealing the connection point and preventing saltwater spray from reaching the metal inside:
- Strip 1/4 inch of insulation from each wire end
- Twist the bare wire strands together tightly
- Slide the heat shrink tube over the connection
- Use a heat gun to shrink the tube (keep it 2-3 inches away)
- The tube should grip the wires tightly with no gaps
Material Selection: Stainless Steel and Tinned Copper
Stainless steel resists corrosion far better than regular steel or aluminum in saltwater, costing more upfront but lasting years longer. Tinned copper wire offers excellent corrosion resistance; the tin coating protects copper from oxidation, always specify tinned copper for boat wiring. Brass connectors resist saltwater corrosion better than steel but still require dielectric grease and proper waterproofing. Avoid aluminum connectors; they corrode rapidly in saltwater.
Best Marine Corrosion Inhibitor Spray for Electrical Systems
Corrosion inhibitor sprays create a protective coating and work best as preventive maintenance before corrosion starts. Use sprays labeled for marine or electrical use; general-purpose lubricants leave sticky residue that attracts salt and accelerates corrosion.
Apply corrosion inhibitor spray to:
- Light fixture mounting brackets
- Connector housings (not inside the connector)
- Wire terminals and ring lugs
- Metal light covers and bezels
- Bonding straps and clips
Marine Grade Electrical Connection Protection Methods
Marine-grade protection involves a system approach that protects your entire electrical circuit from corrosion.
Sacrificial Anodes and Bonding Systems
Sacrificial anodes corrode instead of your equipment through galvanic protection. Zinc anodes are most common; they corrode faster than stainless steel and aluminum, protecting your fixtures and wiring. Replace annually or when they lose 50% of their mass.
Protecting Light Fixtures and Sockets
Light fixtures and sockets need multiple layers of protection due to constant saltwater spray and UV exposure. Use marine-grade light fixtures with IP67 or IP69K waterproof ratings. T-Toplights specializes in marine-grade LED lighting engineered for harsh conditions with waterproof ratings that prevent corrosion.
Step-by-Step Maintenance Schedule for Marine Lights
Regular maintenance catches corrosion in early stages before it causes electrical failures or safety hazards. A structured schedule prevents neglect followed by emergency repairs.
Monthly Inspection Routine (During Boating Season)
Perform these checks every 30 days while actively using your boat:
12MM Rigid Aluminum U Channel for →
Visual inspection for early corrosion signs:
- Examine all light connectors for white, green, or blue crusty buildup. White deposits indicate aluminum oxidation; green indicates copper oxidation; blue-green suggests brass corrosion.
- Check connector housings for moisture inside. If you see water droplets or condensation, the seal has failed and internal corrosion is likely developing.
- Inspect bonding straps and clips for corrosion or loose connections.
- Look at wire insulation where it enters light fixtures. Cracks or exposed copper indicate UV damage or heat stress.
- Test each light to confirm it operates at full brightness. Dimming or flickering suggests increasing electrical resistance from corrosion.
- Check that all light fixtures are mechanically secure and not loose.
Immediate action if corrosion is detected:
- Disconnect the light from power at the circuit breaker.
- Carefully separate the connector and inspect both sides.
- Clean corroded contacts with contact cleaner and a soft brass brush (not steel wool).
- Dry completely with compressed air.
- Apply a thin layer of dielectric grease to each contact pin.
- Reconnect and test. If the light still flickers or dims, replace the fixture rather than cleaning.
Seasonal Deep Maintenance (Twice Yearly)
Perform comprehensive maintenance before peak boating season (spring) and before winter storage (fall).
Spring pre-season maintenance (before heavy use):
- Disconnect all light circuits from power at the main electrical panel.
- Remove each light fixture by unbolting the mounting bracket.
- Inspect the mounting surface for corrosion, water damage, or mold.
- Clean all connectors with contact cleaner and a soft brush. For heavily corroded connectors, soak for 10 minutes before brushing.
- Dry with compressed air.
- Inspect the gasket or rubber seal around the fixture base. Replace if compressed, cracked, or hardened.
- Apply fresh dielectric grease to all contact points inside the connector.
- Inspect the wire insulation where it enters the fixture. Replace if cracked or copper is exposed.
- Reinstall the fixture with a new bead of RTV silicone sealant around the mounting base. Cure for 24 hours before water exposure.
- Test all lights at full brightness. If dim or flickering, replace the fixture.
- Apply corrosion inhibitor spray to all exposed metal parts.
Fall pre-storage maintenance (before winter layup):
- Rinse all light fixtures with fresh water to remove salt deposits.
- Disconnect all light circuits from power.
- Remove each fixture and inspect for water inside the housing. Replace if water is present.
- Clean all connectors with contact cleaner.
- Apply dielectric grease to all contact points.
- Inspect gaskets and seals. Replace if compressed or cracked.
- Reinstall fixtures with fresh sealant.
- Apply corrosion inhibitor spray to all exposed metal parts.
- For outdoor storage, apply a thin marine wax to light covers and brackets to prevent salt creep.
Annual Bonding System Inspection
Perform this inspection once per year, typically during spring pre-season maintenance.
- Locate your main bonding bus (usually in the engine compartment or electrical panel).
- Inspect all bonding straps for corrosion, loose connections, or broken lugs. A corroded bonding connection is as problematic as a missing connection.
- Using a multimeter set to resistance (ohms), measure the resistance between the main bonding bus and each light fixture's metal structure. Resistance should be less than 0.1 ohms. Higher resistance indicates a failing bonding connection that needs cleaning or replacement.
- Inspect your sacrificial zinc anode. If it has lost more than 50% of its mass since the previous inspection, replace it immediately. Do not wait until the next scheduled maintenance.
- If your boat has multiple zinc anodes (one for the bonding system, others for the engine or hull), verify that each is properly connected and not isolated from the others.
Maintenance Schedule Summary
| Task | Frequency | Purpose |
|---|---|---|
| Visual inspection for corrosion deposits | Monthly (boating season) | Catch early-stage corrosion before it causes electrical failure |
| Test light brightness | Monthly (boating season) | Detect increasing electrical resistance from internal corrosion |
| Clean and re-grease corroded connectors | As needed (within 48 hours of detection) | Restore electrical conductivity and prevent progression |
| Deep cleaning and gasket replacement | Twice yearly (spring and fall) | Remove accumulated salt and moisture; replace degraded seals |
| Bonding system resistance testing | Annually (spring) | Verify galvanic protection is functioning |
| Zinc anode inspection and replacement | Annually (spring) or when 50% consumed | Maintain cathodic protection |
This schedule helps prevent marine light corrosion problems and extends fixture life.
LED vs. Incandescent: Corrosion Susceptibility Differences
LED lights and incandescent lights respond differently to corrosion in marine environments.
Frequently Asked Questions
How do you waterproof LED light connections on a boat?
Start by cleaning connectors with contact cleaner to remove salt residue and oxidation. Apply dielectric grease generously to all connection points, then use heat shrink connectors or silicone end caps to seal the connection completely. For additional protection, wrap the connection with self-fusing silicone tape and consider using stainless steel or tinned copper hardware. Ensure all electrical connections are rated for marine environments and periodically inspect for moisture intrusion or white corrosion buildup.
What is the best marine corrosion inhibitor spray for electrical connections?
A marine-grade corrosion inhibitor spray should form a moisture barrier without affecting electrical conductivity. Look for products specifically formulated for electrical systems that contain rust preventatives and water-repellent properties. Apply the spray after cleaning connections and before final sealing. The spray creates a protective film that prevents saltwater and moisture from reaching the metal. Always allow the spray to dry completely before reassembling connections, and reapply annually or after heavy exposure to saltwater spray.
What causes corrosion on marine light fixtures?
Marine light corrosion occurs through three primary mechanisms: galvanic corrosion (when dissimilar metals contact in saltwater), electrolysis (electrical current flowing through saltwater between components), and oxidation from exposure to salt spray and moisture. Saltwater accelerates all three processes significantly faster than freshwater. The combination of high salinity, moisture, oxygen, and electrical current creates an ideal environment for rapid corrosion. Even small gaps in waterproofing allow saltwater to penetrate connections and initiate corrosion within weeks.
How often should you inspect marine lighting for corrosion?
Inspect marine lights monthly during the boating season, looking for white or green corrosion deposits, pitting, or discoloration on connectors and fixtures. In saltwater environments, perform a detailed inspection every three months and clean connections with contact cleaner. After heavy saltwater exposure or storms, inspect immediately. Conduct a comprehensive seasonal deep cleaning before winter storage and before the start of summer boating season. Early detection prevents electrical failures and extends the life of your lighting system significantly.